
Have you designed and built a killer app?
Are you starting out with an app idea?
Either way, you’ll need to think about your app’s user experience! Here’s how to improve it with a splash screen and whisky.
Response Times
When designing an app, one of the most important issues to consider is user experience. Much can be done to improve the user experience, but an app’s response times can be the lowest-hanging fruit. Quick response times won’t make up for bad content, but slow response times will certainly taint an otherwise excellent app.
Web research says that 0.1 second of response time or less allows a user to think something is happening instantaneously. 1.0 second of response time or less allows the user’s flow of thought to remain uninterrupted. And 10 seconds of response time is the longest a user will wait before starting to perform other tasks while a website loads.
Similar limits apply to desktop and mobile apps. In-app delays are especially likely in mobile apps because a mobile app has inferior processing power and there is always the possibility a mobile app will be battling poor signal strength.
Because response time can be unpredictable, a key component of an app is something which provides user feedback showing something is happening for delays between 1 and 10 seconds and showing what progress is being made for delays over 10 seconds. Alternatively, one can try and conglomerate as much wait time as possible at the beginning of an app to limit wait time throughout the use of the app.
The Splash Solution
One way to solve this wait time problem is to design a “splash screen.” A splash screen is something the user will see while all the connection-dependent or processing-heavy components of your app are loaded. A splash screen is not just a tool for hiding processing. It can also convey something essential and perhaps intangible about your app. Having said that, a majority of splash screens are extremely simple, using just the logo of the app or company.
It might be possible to download all online data used in the running of your app so that it works completely offline. This avoids any potential user frustration coming from intermittent signal strength. Beware caching too much data however, as people who have limited data packages on their phone won’t be too happy about your app using so much of it!
Splash Screen Example: Whisky app
I wanted to make an app for fellow members of the Southside Whisky Club here in Edinburgh, so that we can share tasting notes and ratings of whiskies and keep track of what we’ve tried. Since this requires accessing various bits of data from a database and performing various configuration operations, I thought a splash screen showing progress while the app loads would be useful for users.
I decided to have a gradually filling whisky glass to provide feedback to the user on how the loading is going – essentially just a fancy progress bar. Thinking through the possible ways of achieving the fill, I came up with a few options:
- 100 images, one for each stage of whisky glass fullness: This has the advantage of being very easy to code. You could simply replace image n by image n+1 to increase the progress percentage by one. It has, however, the major disadvantage of having to include 100 images in the app, which either greatly inflates the size of the app, or greatly reduces the potential quality of the image.
- An empty glass image that would gradually fill with whisky color (using a graphic or similar): This would require very few image assets included in the app, but would probably involve some pretty complex gradient creation – and I’m no graphic designer!
- An empty glass image and a full glass image, with the latter starting cropped and gradually expanding to fill the glass: A good compromise between coding and image resource size – the third option seemed to be the best to me!
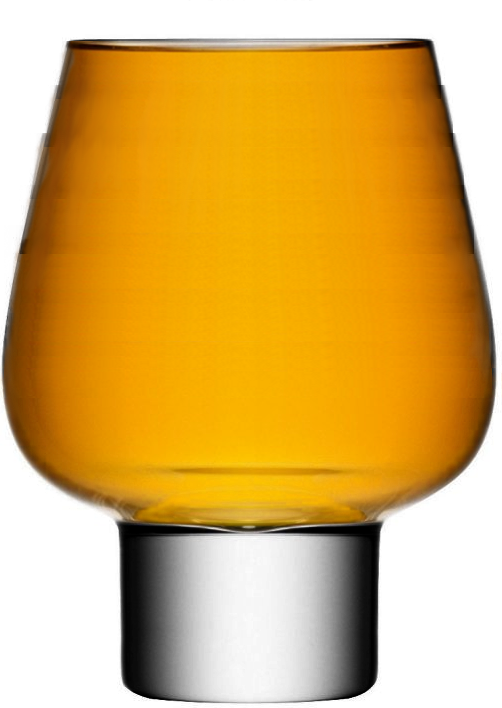
I found some appropriate images online

And I photoshopped the full version to add a bit more whisky to it – not my finest effort, although it suffices for now!
Now, to make the progress bar:
The first step is to import the images of the full and empty glass into the stack. I chose to import them as referenced controls, rather than embedded images.
Referenced images have their filename property set to a file on disk, so that the image object will display whatever image data is contained in the referenced file. I chose this option because I figured I might want to edit the images at a later date (i.e. to improve the look of the liquid in the glass, which, as you see, is slightly shoddy at the moment).
Next, I grouped the full image, named the group “Full” and set the rect to that of the empty image. LiveCode’s groups are very good to use for cropping. In general, changing the width and height of an object will resize the object, whereas changing the width and height of a group containing an object will crop it. So far, so good – I now had the glass in its full state.
I then added the following command to empty the glass so that the image of the full glass was cropped and none of the glass’s liquid was visible.
constant kBaseProportion = 0.3 -- The base of the glass takes up approximately 30% of the image
local sLiquidTop -- Keep track of the real value of the top of the liquid

# Set the height of group "Full" to zero whilst keeping the bottom constant
on emptyGlass
   local tRect
   put the rect of group "Full" into tRect
   # Set sLiquidTop to the top of the liquid when the glass is empty
   # We need this in a separate variable because the value of the top of the group will be rounded
   put the bottom of image "empty" - the height of image "Empty" * kBaseProportion into sLiquidTop
   put sLiquidTop into item 2 of tRect
   set the rect of group "Full" to tRect
end emptyGlass
I needed to be able to fill the glass by an arbitrary amount, achieved using the following command, which reveals more of the full image by increasing the height of its containing group:
# Increase the height of group "Full" by pAmount whilst keeping the bottom constant
on fillUpGlassBy pAmount
   lock screen
   local tRect
   put the rect of group "Full" into tRect
   subtract pAmount from sLiquidTop
   put sLiquidTop into item 2 of tRect
   set the rect of group "Full" to tRect
   unlock screen
end fillUpGlassBy
The only missing ingredient now is a command to execute whenever the progress needs to be updated:
local sProgress -- Script local to store the current progress
constant kLiquidProportion = 0.5 -- How much of the image is taken up by liquid
on progressUpdate pProgress
   local tIncrease
   # Calculate how much to fill up the glass
   put pProgress - sProgress into tIncrease
   # Update the stored progress amount
   put pProgress into sProgress
   # Fill the glass in increments of 1 to get smooth animation
   repeat tIncrease
      fillUpGlassBy (the height of image "Empty" * kLiquidProportion / 100)
   end repeat
end progressUpdate
Note that kLiquidProportion is the proportion of the whole image taken up by liquid when the glass is full, rather than the amount that the glass itself is full – I like a healthy sized dram but half full is possibly a bit overboard. Toggling the value of kLiquidProportion will cause the glass to fill to a different level at a different rate.
To finish it all off, I wanted to improve the look of the surface of the liquid. Obviously, it shouldn’t just be a totally straight line. I decided to cut out the top of the liquid from the actual image, and use some LiveCode trickery to work out how wide the image should be at each stage.
![]()
Here is the code I used to measure the width of the glass at each height – I just create a 1 pixel high snapshot of the glass, find the first and last non-transparent pixels, and subtract to get the appropriate width:
# Calculate the width of the glass at the specified level
function measureCrossSectionAt pLevel
   # Don't update the screen or send any messages while calculating
   lock screen
   lock messages

   # Create a 1 pixel high snapshot of the empty glass at the specified level
   local tRect
   put the rect of image "Empty" into tRect
   put pLevel into item 2 of tRect
   put pLevel -1 into item 4 of tRect
   import snapshot from rect ( tRect ) of image "Empty"

   # Get the alpha data of the snaphot
   # Any transparent pixels are null bytes in the alpha data
   local tImgID, tAlphaData
   put the long id of the last image into tImgID
   put the alphaData of tImgID into tAlphaData

   # We want to find the first and last non-transparent pixels
   local tStart, tEnd

   local tIndex
   put 1 into tIndex
   # Find the first non-transparent pixel
   repeat while byteToNum(byte tIndex of tAlphaData) is 0
      add 1 to tIndex
   end repeat
   put tIndex into tStart

   # Find the last non-transparent pixel
   repeat while byteToNum(byte -tIndex of tAlphaData) is 0
      add 1 to tIndex
   end repeat
   put the number of bytes in tAlphaData - tIndex into tEnd

   # Delete the snapshot
   delete tImgID

   unlock messages
   unlock screen

   # Return the calculated pixel width (minus a couple of pixels for the glass boundary)
   return (tEnd - tStart) - 4
end measureCrossSectionAt
Because I imported the image of the surface of the liquid, I can recalculate the width of the glass when the whisky is at that level, and set the width of the image accordingly whenever I update the progress.
To do this, I start with a small utility command for changing the width of the image:
# Utility for setting the width and height proportionally of the surface image
on setWidthOfTop pWidth
   local tRatio
   put pWidth / the width of image "Top" into tRatio
   set the width of image "Top" to the width of image "Top" * tRatio
   set the height of image "Top" to the height of image "Top" * tRatio
   # Ensure the image is centered
   set the loc of image "Top" to (the width of me / 2), 0
   # Ensure the image is in the right place relative to the image of the liquid
   set the bottom of image "Top" to (the top of group "Full" + 3)
end setWidthOfTop
Then I add the new version of the fill command
# Increase the height of group "Full" by pAmount whilst keeping the bottom constant
on fillUpGlassBy pAmount
   lock screen
   local tRect
   put the rect of group "Full" into tRect
   subtract pAmount from sLiquidTop
   put sLiquidTop into item 2 of tRect
   set the rect of group "Full" to tRect
   # Update the liquid surface
   setWidthOfTop measureCrossSectionAt(the top of group "Full")
   unlock screen
end fillUpGlassBy
And voila! We have a nicely filling glass of whisky to use as a progress bar!
Of course, one of the great things about LiveCode 8 is that a custom progress bar can be completely encapsulated and dragged out as an object in its own right. I created the splash screen for my whisky app a while ago, but if I were to redo it, I would certainly rewrite the filling glass as a widget. If you would like more information about how to do this, see Georgia’s blog post about how to create a widget and Trevor DeVore’s blog on creating a busy indicator.
On a final note, I would happily trade bugfixes for whisky, but I’m not sure it’s allowed.
Download my whisky splash stack here
Have you created a progress bar for your app? What did it look like and how did you create it? Share in the comments below!
3 comments
Join the conversationmalte - July 28, 2015
On the topic of trading bugfixes for whisky: I still have a bounty running:
http://forums.livecode.com/viewtopic.php?f=66&t=15164
Currently at 4 bottles…. So you could get seriously tipsy! 🙂
Ali Lloyd - July 28, 2015
Well that *is* rather tempting… I’m not sure how high I rate my chances though 🙂
François - August 21, 2015
I’m flabbergasted!
Q.: “How to Create a Great User Experience in Mobile Apps”
A.: “Design a smart animated splash screen”.
Are you kidding? This sure IS a fun (though long) piece of code but not a way to “Create a Great User Experience in Mobile App”.
Ali, I don’t know whether or not you work at Livecode. Here’s to the Livecode development team:
A way to create a great user experience would be to build standard iOS controls in Livecode. Nowadays, instead of developing apps, each developper has to develop for himself from scratch standard controls like scrolling data grids. No example stack available. Just search for “scroll” in the iOS forum and count the number of posts.
I know that the Livecode team has a tremendous amount of work and does it fine.
But between us, shouldn’t you rather post a stack to do the UI of, for instance, the “Weather” app (scrolling, new, delete, reorder), instead of drawing whisky filling a glass?