
It is great teaching children how to program and their motivation can be particularly high if the turnaround time is short and the app has a practical benefit to them.
My daughter has a passion for all stuff technical and especially loves mathematics, and of course she is not new to LiveCode. When she was eight I introduced her to the idea of writing a calculator and it did not take much arm twisting to get the project going.
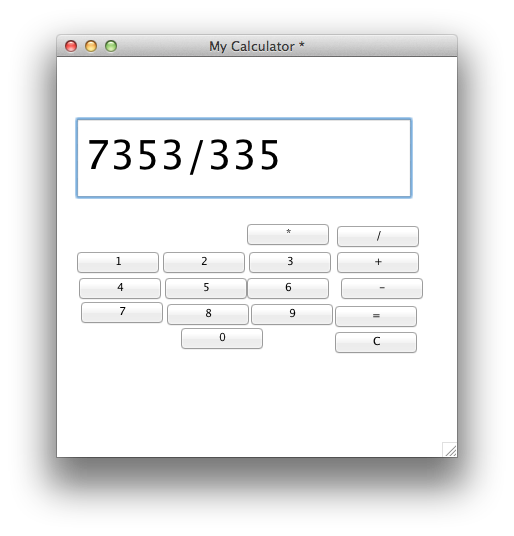
We started by creating the UI and dragged a field onto a card for the display and buttons for the input. We then added symbols to the buttons that you would normally expect to see on a calculator. UI done, and this was clearly the most fun part for my daughter.
Then came the code that we placed in the card script. If you have experience with other programming languages, then implementing a generic evaluation function for equations can be somewhat beyond the level of a simple childrens’ app. Anyway LiveCode has this covered and allows you to implement a basic calculator algorithm in less than 10 lines of code, and that includes the handler name:
on mouseUp
   if the short name of target is "=" then
      do "do" && quote & "put" && field 1 && "into field 1" & quote
   else if the short name of target is "C" then
      put empty into field 1
   else if word 1 of the name of target is "button" and (char -1 of field 1 is a number or char -1 of field 1 is not the short name of target) then
      put the short name of target after field 1
   end if
end mouseUp
This code consists of an "if statement" in which three possible display altering lines of code can be executed. The first part of the "if condition"
tests if the "=" button was pressed, with the "do …" line performing all of the evaluation magic and placing the result into the display field. Take a closer look at that line and check out how much it actually does.
The next part of the "if statement" tests if the "C" button was pressed and then allows the code to be executed that clears the content of the display field.
The last part of the if condition tests if the button pressed is valid for display in the display field. If it is, the value is placed at the end of the content that is already displayed in the display field.
Calculator done, we decided to skipped some of the "do" details and enjoyed the fact that it worked.
Now this is a very simple implementation of a calculator and certainly keeps attention focused while you put the app together. There are obvious shortcomings that would merit further development, for example some graceful exception handling if the function evaluation should fail, and of course calculators can come with loads more buttons than the ones shown here. Try adding some other features and see what else you can calculate with this app.
If you have similar experiences or suggestions for cool kids’ apps, then I would love to hear from you and see what great experiences you have had.
3 comments
Join the conversationrunrev - March 25, 2014
Hanson builds a calculator app with his daughter – http://t.co/UeC1Qom0WP
Edmund Humenberger - March 26, 2014
Just filled out the survey, but forgt to mention.
Integration of georeferencing (‘Where is an adress on the map”), datatye “location” and integration of openstreetmap (with different layer styles would be really great)
Also GPX integration would be great (just think about making your own bike navigation app)
location and maps is a more and more important theme in application development.
yourw
Edu_Techie - March 26, 2014
RT @runrev: Kids and App Fun: It is great teaching children how to program and their motivation can be particularly high… http://t.co/0XT…