
Before you can use iOS deployment, you have to install the appropriate iOS SDKs that available from Apple. This guide will take you through the steps required to allow you to develop, test and build iOS apps with LiveCode.
Software Requirements
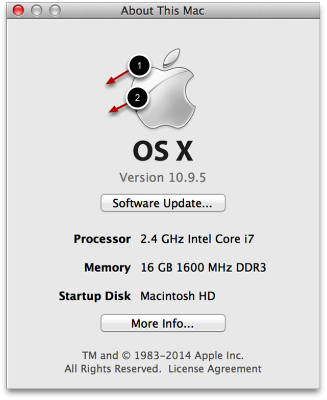
The iOS SDKS come as part of the Xcode app bundle. In order to build iOS apps in LiveCode, you must be using an appropriate version of the Mac operating system running on the Intel architecture .You can determine what operating system you have installed and the hardware platform you are using by selecting Apple > About This Mac from the top of your screen:
-
This indicates the operating system you are using.
-
This indicates the hardware architecture of your Central Processing Unit (CPU). You should be looking for the word Intel.
Note: It is assumed that you are familiar with the installation process of an Apple operating system and LiveCode. Please make sure these are installed before you commence with the remaining steps of this lesson.
Joining the iOS Developer Program
Before you can continue with the installation, it is advisable that you join the Apple Developer Program. You can join by following this link. It is free to sign up and no payment is currently required if you are testing via the iOS simulator but is subscription based if you plan on testing your applications on physical devices.
Once you have signed up to the Apple paid for iOS Developer Program, you can go to the iOS Developer Portal and set up the required certificates (link is on the top-right of the page). Follow this guide for information on the process: Maintain Signing Identities and Certificates
Downloading and installing the iOS SDK
If you do not have the iOS SDK installed, then you can download it from the Mac App Store.

Alternatively, you can download older revisions of Xcode via the Downloads section of your Apple Developer Account.
Configuring LiveCode for iOS Support
By now, you should have successfully installed the required software in your development environment. The next step is to launch LiveCode and configure it to interface with the iOS SDK.
Launch the LiveCode IDE and select LiveCode > Preferences to launch the Preferences menu. Then select Mobile Support and you are presented with the dialog shown in this step.
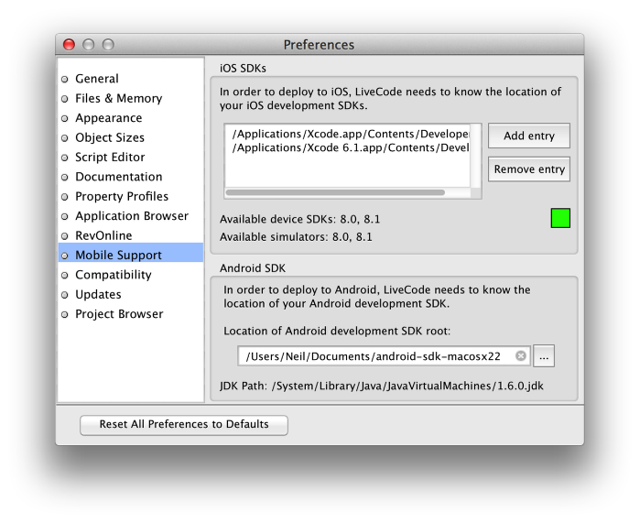
When you select "Add Entry", you will be prompted as to whether your installed version of Xcode is "4.2 or earlier" or "4.3 or later". If you are using the latest versions of Xcode, you will want to select the latter. You will then need to supply the location of your Xcode application bundle (for example, /Applications/Xcode). The rest of the filepath will automatically be populated for you.
Validation checks are made once you specify the location of the iOS paths. This ensures that you have selected a valid location and have the require iOS components installed.
Configuring an iOS Standalone
To configure a stack for iOS, you use the iOS deployment pane in the Standalone Application Settings dialog, opened by selecting Standalone Application Settings from the File menu.
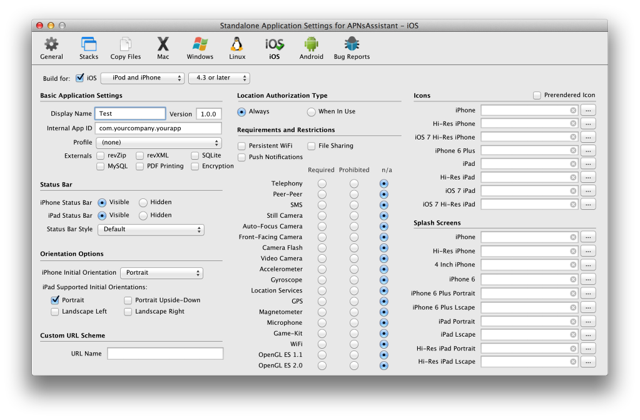
To make a stack build for iOS, check the Build for iOS button and configure any options that you wish.
This pane allows you to set the iOS-specific options for your application. You can also add files you wish to be included in the bundle using the Copy Files pane, and set the (bundle) name of your application on the General pane.
Note: Making a stack build for iOS disables building for any other platform, this is only true of the standalone’s mainstack. If you wish to share code and resources among platforms, factor your application into multiple stacks, using a different mainstack for iOS and desktop targets.
Note: The Inclusions, Copy Referenced Files, Bug Reports and Stacks features are not available when building for iOS. If you wish to include multiple stackfiles in your application, use the Copy Files feature instead.
Testing in the iOS simulator
Once you have a stack configured for iOS, you can run it in the iOS Simulator by using the Test button on the Menubar.
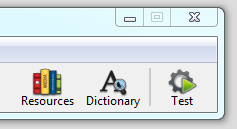
This button is enabled for any stack that has been configured for iOS deployment, and clicking it launches the stack in the simulator, terminating a running simulation if any.
You can also access the Test action from the Development menu. Additionally this is where you can configure which target iOS simulator to use:

Here you can choose which simulated device to use for iOS testing. Any setting you choose here takes effect the next time you use the Test button or menu-item.
Note: If the Test button or menu-item remains disabled, even if you have configured a stack for iOS deployment, it probably means you have not configured your SDKs correctly. In this case, check that there are available simulators in the Mobile Support pane of Preferences.
Testing on a Physical Device
In order to run an application on a physical device, you need to build a standalone app and load this onto your device using the Organizer window of Xcode.
iOS