
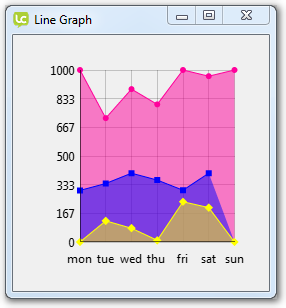
Filling the area below the lines
The next modification we will make is to add a boolean property that allows the user to choose whether to fill the area below the lines.
The area under a line is filled with a semi-transparent version of the line color.
The fillLines property definition
The first step is to define the fillLines property.
- Define the fillLines property, with a property setter handler SetFillLines.
- Define the property metadata
- Default – “false”
- Label – “Fill graph lines”
Include documentation for the fillLines property. Look back on Lesson 4, Step 7: Documenting the widget if you need a refresher on documenting widgets.
widget community.livecode.elanorb.modifiedlinegraph
-- dependency declarations
-- widget metadata
-- property definitions
/**
Summary: Whether chart lines are filled

Syntax:
set the fillLines of <widget> to { true | false }
get the fillLines of <widget>

Value (boolean): True if lines should be filled; false otherwise.

Description:
If true, the graph widget will draw graph lines on the graph. The
<fillLines> property defaults to false.

Related: markerStyles (property), showLines (property)
*/

property fillLines get mFillLines set SetFillLines
metadata fillLines.default is "false"
metadata fillLines.label is "Fill graph lines”
-- widget code
end widget
The fillLines property definition
Next add an instance variable to hold the value of the fillLines property.
The fillLines property is a boolean value, so either true or false.
widget community.livecode.elanorb.modifiedlinegraph
    -- dependency declarations
    -- widget metadata
    -- property definitions
    -- private instance variables

   private variable mLinesShow as Boolean
   private variable mFillLines as Boolean

   -- continued private instance variables
   -- widget code
end widget
Update OnCreate
To ensure that the value of fillLines is set when the widget is created we need to update OnCreate.
Set the value of the mFillLines instance variable to the default value, false.
public handler OnCreate() returns nothing
   … exisiting code
   put false into mFillLines
end handler
The SetFillLines handler
The next step is to implement the property setter for fillLines.
Add the SetFillLines handler.
- The handler takes a boolean as an in parameter
- Check pFillLines is different than the current value of mFillLines.
- Update the mFillLines instance variable
- Redraw the widget
public handler SetFillLines(in pFillLines as Boolean)
    if pFillLines is not mFillLinesthen
        put pFillLines into mFillLines
        redraw all
    end if
end handler
Update OnSave
To ensure the fillLines property is saved with the widget we update the OnSave handler.
public handler OnSave(out rProperties as Array)
    put {} into rProperties
    put getData() into rProperties["graphData"]
    put getColors() into rProperties["graphColors"]
    put mGridHShow into rProperties["graphXLines"]
    put mGridVShow into rProperties["graphYLines"]
    put GetHilitedCoordinates() into rProperties["hilitedCoordinates"]
    put mHilitedCoordinatesColor into rProperties["hilitedCoordinatesColor"]
    put mVerticesShow into rProperties["showMarkers"]
    put mMarkerStyles into rProperties["markerStyles"]
    put mLinesShow into rProperties["showLines"]
    put mGridColor into rProperties["gridColor"]
    put mFillLines into rProperties["fillLines"]
end handler
Update OnLoad
To ensure the fillLines property is set when a saved widget is loaded we must update the OnLoad handler.
- Check if “fillLines” is one of the keys in the pProperties array. In there is a key there is a value stored for the property.
- Update the mFillLines instance variable with the stored value of the property.
public handler OnLoad(in pProperties as Array)
    … existing properties
    if "fillLines" is among the keys of pProperties then
        put pProperties["fillLines"] into mFillLines
    end if
    EnsureMarkerStyles()
end handler
Update drawGraph
Next we need to update the piece of code that draws the lines and add code to fill under the lines, if fillLines is true.
Update the line of code in drawGraph that checks if mLinesShow is true to decide add a line to the next point to the path that is being constructed.
If mFillLines is true a line should be added between points, even if mLinesShow is false, so the value of mFillLines should also be taken into account in this check.
private handler drawGraph() returns nothing … previous codeif mLinesShow is true thenif mLinesShow is true or mFillLines is true then if tPointIndex is 1 then move to tPoint on tPath else line to tPoint on tPath end if end if // Draw vertices if mVerticesShow is true then … code continues end handler
Next we add code to fill the area under under the line, if mFillLines is true.
At this point we know
- tPath: a path describing the graph line
- tColour: the color allocated to the line we are currently drawing. This is retrieved from the corresponding of the mColors list which stores the color of each graph line.
To fill the area under the line we construct a path the describes the area under
- tPath: the graph line
- Add a line to the bottom right corner of the grid to tPath
- Add a line to the bottom right corner of the grid to tPath
- Close tPath
Next we add code to fill the area under under the line, if mFillLines is true.
Add the code to drawGraph after the vertices and line have been drawn.
- Save the state of the canvas.
- Calculate the fill colour by dividing the alpha value of tColour by 2. This makes it twice as transparent.
- Set the paint to the new tColour value
- Add instructions to tPath to construct a path that describes the area under the line.
- Fill the area defined by tPath
- Restore the state of the canvas.
private handler drawGraph() returns nothing
    … previous code
    if mLinesShow is true then
        stroke tPath on this canvas
    end if

    if mFillLines is true then
        save state of this canvas
        set the alpha of tColour to the alpha of tColour / 2
        set the paint of this canvas to solid paint with tColour
        line to point [the right of mGridRect,the bottom of mGridRect] on tPath
        line to point [the left of mGridRect,the bottom of mGridRect] on tPath
        close path on tPath
        fill tPath on this canvas
        restore state of this canvas
    end if

    if mVerticesShow is true and mMarkerStyles[tGraphLine - 1] is not "" then
    … code contines
end handler
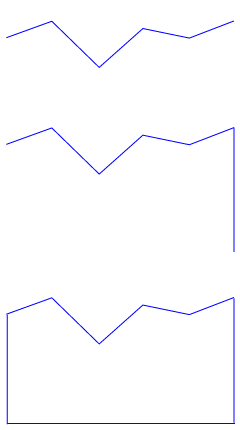
Describing Paths
LiveCode Builder allows you to use SVG paths in your widgets.
Paths can be stroked (drawn as a line) or filled (filled as a solid shape).
A path consists of a number of instructions, which are analogous to how you might describe moving a pen on a piece of paper to draw a path. For example
Move to 50,50
Line to 100,100
…
The format of the path instructions is the same as that used for SVG path data as defined here – http://www.w3.org/TR/SVG/paths.html.
Test the widget
Test that the widget compiles with these changes.
- Open the Extension Builder from the Tools menu.
- Load the Modified Line Graph LCB file.
- Click Test.
- Select the sample widget.
- Open the Property Inspector.
- Go to the Colors pane.
- Change the Grid color.
