
HTML5 and now a Mobile LiveCode IDE I hear you all cry!…..well sort of 🙂
Before you continue reading this post, I have to make you aware that this is not a mobile IDE that we are working on in-house but a personal fun project (proof of concept) that I have started and like to dive into whenever I get a spare moment (which is very rarely).
There has been much discussion of a LiveCode IDE that runs on mobile devices. This would not only take the creation of LiveCode applications into the mobile space, but would also open up LiveCode to a whole new market.
So without further ado, I give you my LiveCode Mobile IDE!!! (Trumpets Please!)
Tada!
Now I know that my graphic design skills are nothing to shout home about, but all of that can come later. Getting the functionality done first is key.
So let me give you a brief overview of what I’ve accomplished so far:
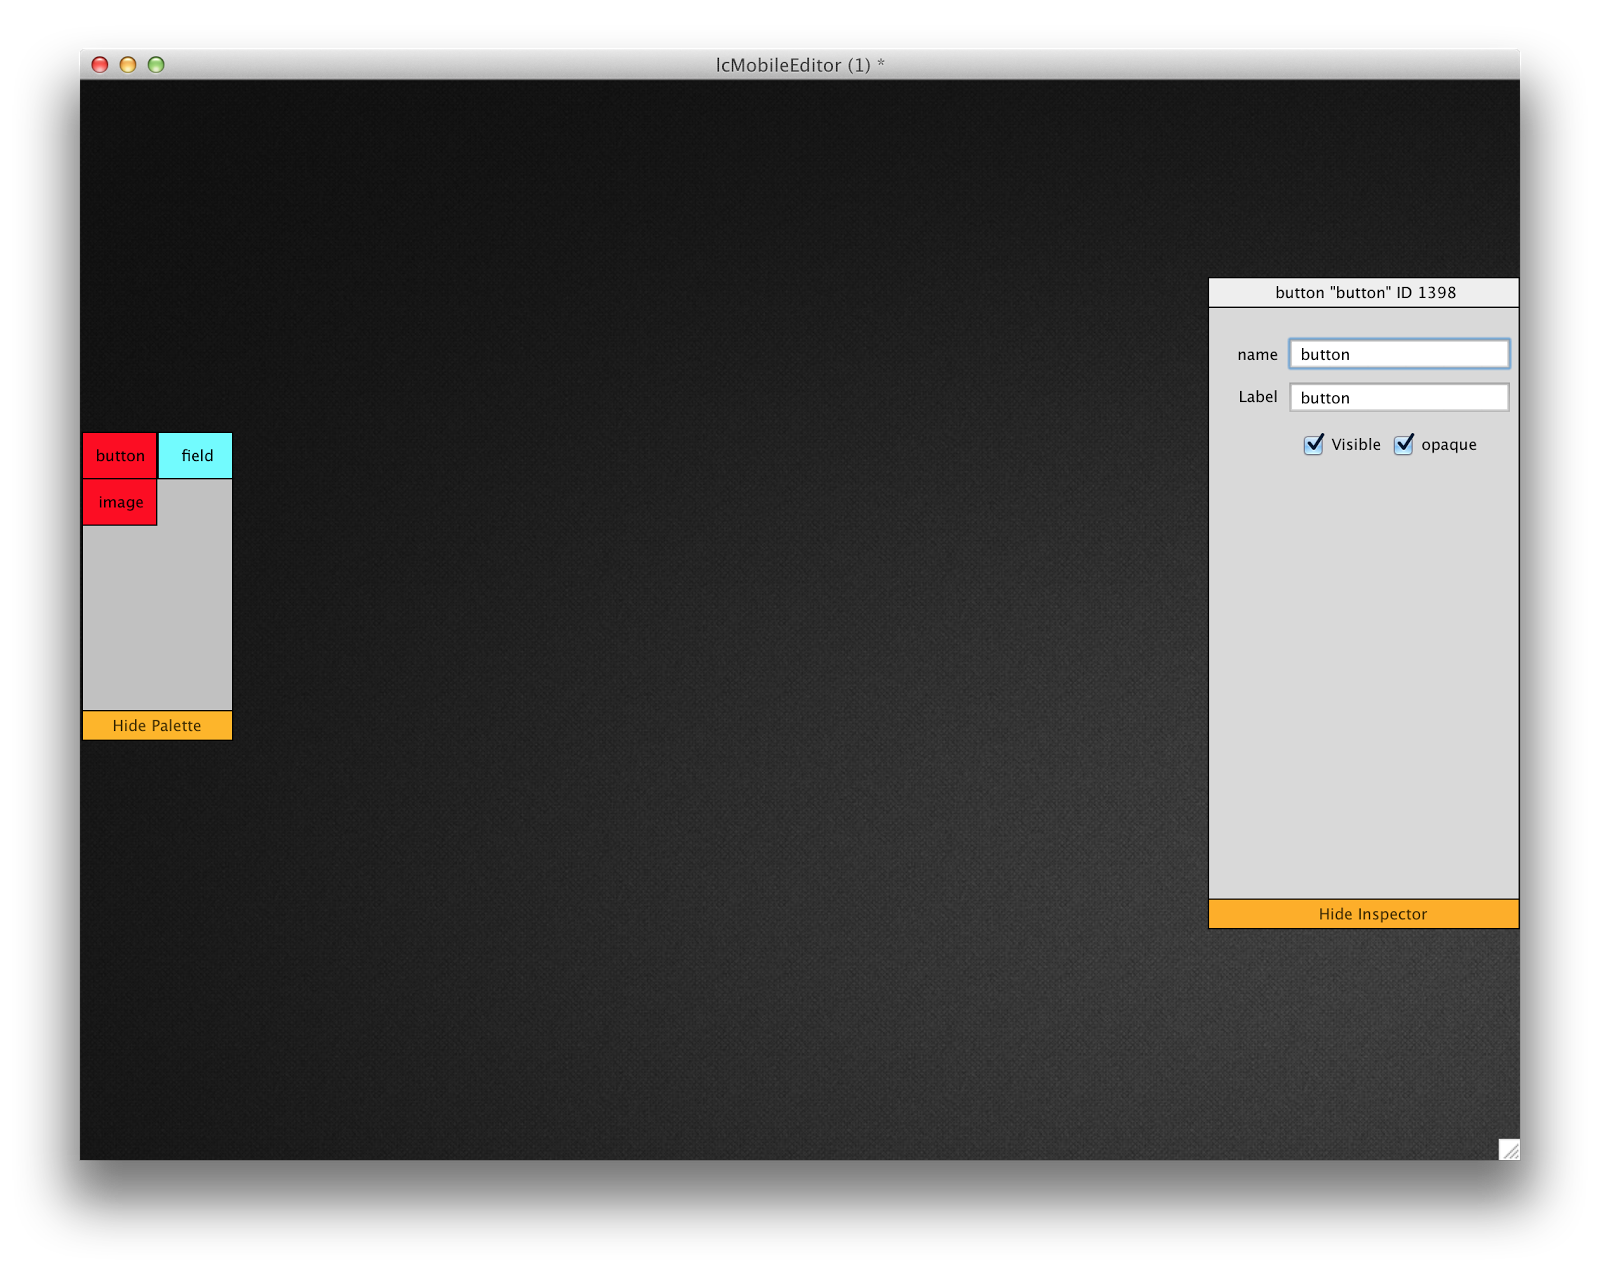
- basic tools palette (buttons, fields and image objects)
- basic property inspector (name, label, visible & opaque properties)
- Ability to show and hide these palettes by clicking on relevant yellow sections
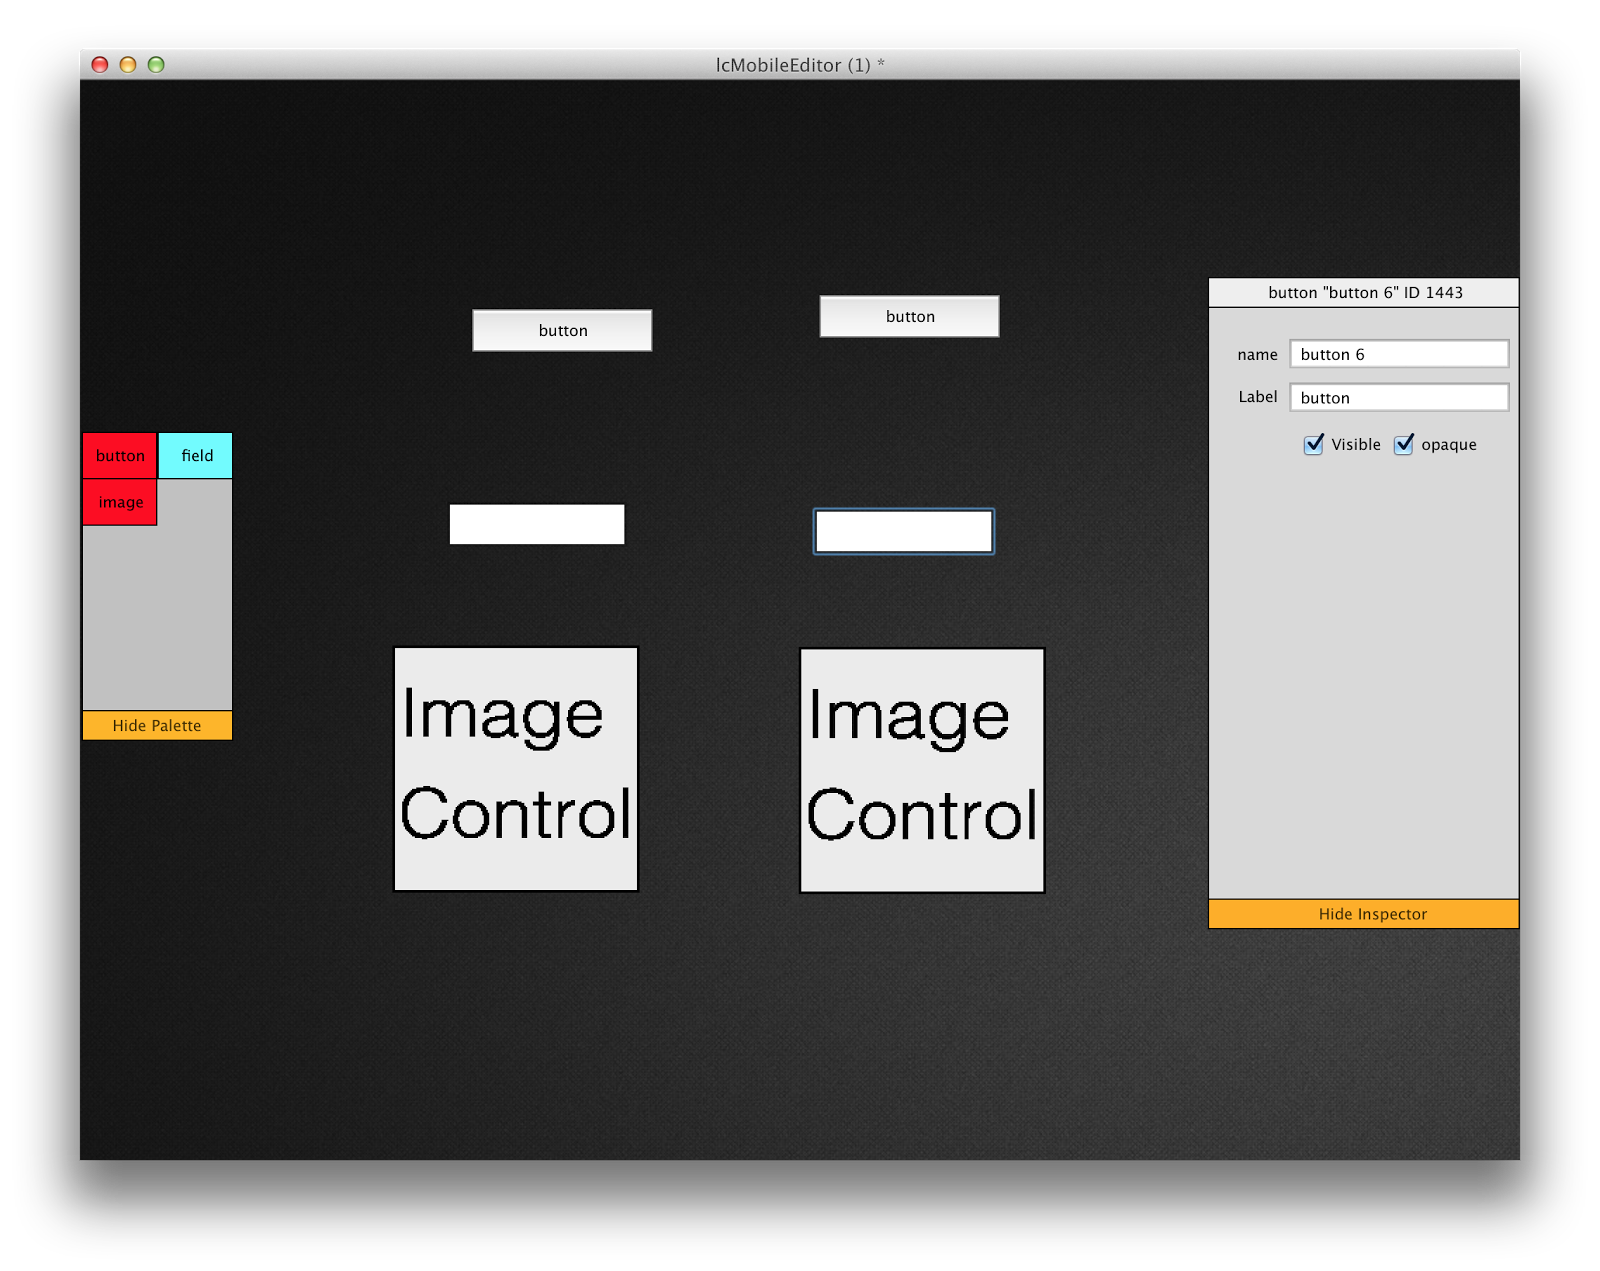
- Creation of control by dragging them from tools palette
- Move Controls after they have been placed
- Edit scripts of controls by long pressing the control
- Edit a field contents by double clicking control
- Works across supported platforms (minus server)
After I started scripting the above, I soon began to realise the sheer quantity of elements there are within the desktop IDE and what I have achieved so far is only the tip of the iceberg.
So let me explain how I accomplished some of this but please be gentle with my code as it can get quite unruly at points 😀
Palette Creation
The first step was creating both the tools and property inspector palettes. These are just grouped controls of graphics objects. To show and hide the palettes, I simply applied a move command to show/hide them depending on their location. Below is the tools palette show/hide script
on mouseUp
if the loc of group "toolsPallete" is 54,360 then
move group "toolsPallete" to -36,360 in 100 milliseconds else
move group "toolsPallete" to 54,360 in 100 milliseconds
end if
end mouseUp
When working with the property inspector palette it knows which control to assign properties to via a global variable which contains the last selected control name. The name, label, visible & opaque properties of the control can then be assigned accordingly.
Creating Controls
Next is onto creating controls. There are various ways that this could be achieved, but I decided to go with a mouseDown on the card script. This meant that all scripts for this action are in one place. I then defined what happened during the mouseDown by checking if the mouse was within the rect of the tools palette via the mouseLoc function. The name of a created control is defined by the amount of pre-existing controls of that type currently present on the card.
local sMouseDown
global gControlName
-- creates controls from tools pallet group
on mouseDown
if the mouseLoc is within the rect of group "toolsPallet" then
put empty into gControlName
put true into sMouseDown
if the mouseloc is within the rect of graphic "buttonGraphic" then
lock screen
create button "button"
set the loc of it to the mouseLoc
set the name of it to (the short name of it && (the number of buttons of this card +1))
set the label of it to "button"
put the name of it into gControlName
set the script of gControlName to the cGrabMe of this stack
unlock screen
end if
if the mouseloc is within the rect of graphic "fieldGraphic" then
lock screen
create field "field"
set the loc of it to the mouseLoc
set the name of it to (the short name of it && (the number of fields of this card +1))
put the name of it into gControlName
set the backGroundColor of it to White
set the script of gControlName to the cFieldScript of this stack
unlock screen
end if
if the mouseloc is within the rect of graphic "imageGraphic" then
lock screen
create image "image"
set the loc of it to the mouseLoc
set the text it to the text of image "ic.png"
set the name of it to (the short name of it && (the number of images of this card +1))
put the name of it into gControlName
set the script of gControlName to the cGrabMe of this stack
unlock screen
end if
end if
end mouseDown
--allows created controls to be moved
on mouseMove
if sMouseDown is true then
if gControlName is not empty then
set the loc of gControlName to the mouseLoc
end if
end if
end mouseMove
--stops controls sticking to mouse loc
on mouseRelease
setInspector
put false into sMouseDown
end mouseRelease
on mouseUp
mouseRelease
end mouseUp
-- sets inspector values to control values
on setInspector
if gControlName is not empty then
put gControlName && "ID" && the id of gControlName into field "nameLabel" of group "inspectorGroup"
put the short name of gControlName into field "nameField" of group "inspectorGroup"
if "image" is not in gControlName then
put the label of gControlName into field "labelField" of group "inspectorGroup"
end if
end if
end setInspector
on updateScript pScript
set the script of gControlName to pScript
end updateScript
A few other things are happening on the card’s script.
- Setting the property inspector values when a control is created or when a control is moved
- Stop control sticking to the mouse position
Custom properties of the stack contain control scripts which deal with re-positioning the control and launching the script editor. The following is the script applied to a button:
global gControlName, gScript
local sMouseLocation
on mouseDown
put the mouseLoc into sMouseLocation
put the name of me into gControlName
setinspector
grab me
end mouseDown
on mouseStillDown
if the mouseLoc is sMouseLocation then
put the script of me into gScript
go to card "scriptEditor"
end if
end mouseStillDown
Script Editor
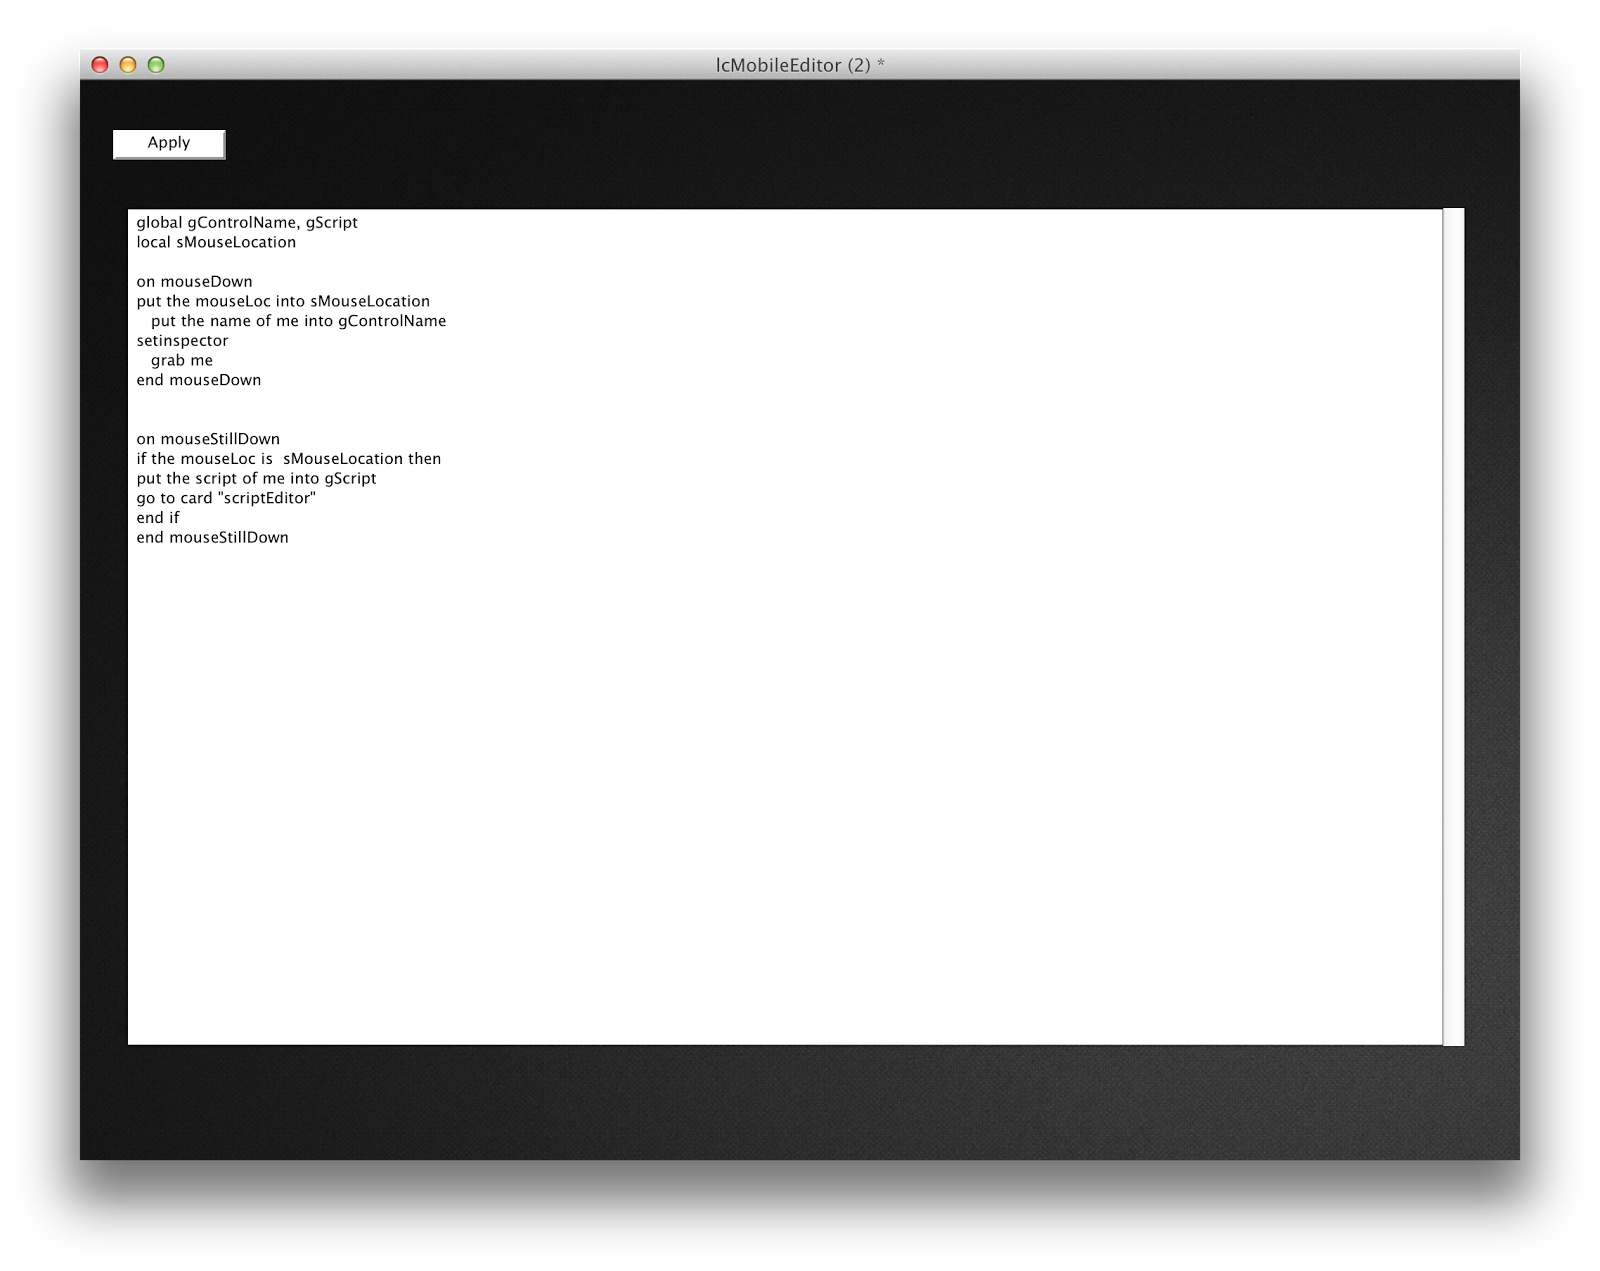
The script editor can be accessed by long pressing (mouseStillDown) on any create control. When a user does this, the script editor card is opened and the script of the control is shown.
You can then edit the script, hit the apply button and it takes you back to the main card where the control’s script should update automatically.
global gControlName, gScript
on mouseUp
put field "codeEditor" into tScript
go card "canvas"
send "updateScript tScript" to card "canvas"
end mouseUp
So there you have it, a very basic mobile IDE 🙂 . As I mentioned previously, there is still a lot of work to do and it will take some time for it to progress into more advance stages of development. (If there were only more hours in the day…)
I hope you enjoyed this post and for those who are interested, here is a link to the current version of the IDE. Please feel free to experiment with it and if you’re up for the challenge, add more features to it.
http://techsupport.on-rev.com/lcMobileEditor.zip
Let us know how you get on or if you have any other feedback in the comments below.

9 comments
Join the conversationNico Goussetis - July 14, 2014
Nico Goussetis liked this on Facebook.
Simon Smith - July 14, 2014
Simon Smith liked this on Facebook.
Neil Allan - July 14, 2014
Neil Allan liked this on Facebook.
David Simpson - July 14, 2014
This is a neat idea, and I enjoy the blog posting.
But it appears that something went wrong with the LiveCode script to image processing, because there is HTML code embedded within the scripts.
Faber Muñoz Perez - July 14, 2014
(y)
Faber Muñoz Perez - July 15, 2014
Faber Muñoz Perez liked this on Facebook.
Neil Roger - July 15, 2014
Hi David,
Thanks for the comment!
Yeah it looks like there has been a copy and paste issue with the script sections above. I’ll have that looked into and rectified asap
abhijit116 - July 19, 2014
RT @runrev: HomeBrew LiveCode Mobile IDE: HTML5 and now a Mobile LiveCode IDE I hear you all cry!…..well sort of 🙂 Be… http://t.co/VX9…
Paul McClernan - July 21, 2014
This would be sweet if it was complete! I’ve actually tried using HyperCard though MiniVMac II emulator for Android just to set up basic stacks, scripts concepts while on the go and then later convert into LC but that was much too convoluted and the emulator needs work (but the dev seems to have abandoned it). A mobile native LC IDE would be awesome! Thanks for the effort!